
Table of Contents
- Why Drop Back Footwork Decides Your Success
- What You’ll Need Before Starting These Drills
- Step 1: Master the 3-Step Drop Mechanics
- Step 2: Build Rhythm With the 5-Step Drop
- Step 3: Eliminate False Steps and Improve Balance
- Step 4: Add Quarterback Agility Training for Pocket Movement
- Step 5: Use Drills for QB Release Time Improvement
- Common Mistakes and How to Fix Them
- Frequently Asked Questions
Last Updated: September 8, 2026
Why Drop Back Footwork Decides Your Success
The quarterback drop back footwork drills you run in practice determine whether you operate with rhythm in the pocket or scramble under pressure. Footwork is the foundation of every throw you make, and drop back footwork is the specific sequence that sets your throwing platform before the ball even leaves your hand. At QB Factory, we have coached hundreds of athletes, including over 300 full scholarship players, and the single biggest separator between starters and backups is almost always consistent, disciplined footwork (ncaa.org).
Most young quarterbacks want to fix their arm first. That is backwards. Your feet get you into position, your hips transfer the energy, and your arm is simply the delivery system. This guide breaks down the exact progression we use to build elite drop back footwork, from the 3-step drop to pocket movement.
What You’ll Need Before Starting These Drills
Before you start any quarterback drop back footwork drills, you need a flat surface, proper cleats, and about 15 yards of space. A grass field is ideal, but turf or a gym floor works for learning the foot patterns. You also need a football and, ideally, a coach or teammate to call cadence.
Set up cones to mark your depth landmarks: 3 yards for a 3-step drop, 5 yards for a 5-step drop. These markers train your eyes to feel depth without looking down. Your stance should be an athletic base, feet shoulder-width apart, knees slightly bent, with your weight on the balls of your feet.
Step 1: Master the 3-Step Drop Mechanics
The 3-step drop is a timing throw designed to get the ball out in under 2 seconds (nfl.com). It is a quick, explosive retreat that sets your platform for slants, quick outs, and screens.
The Mechanical Sequence, Step by Step
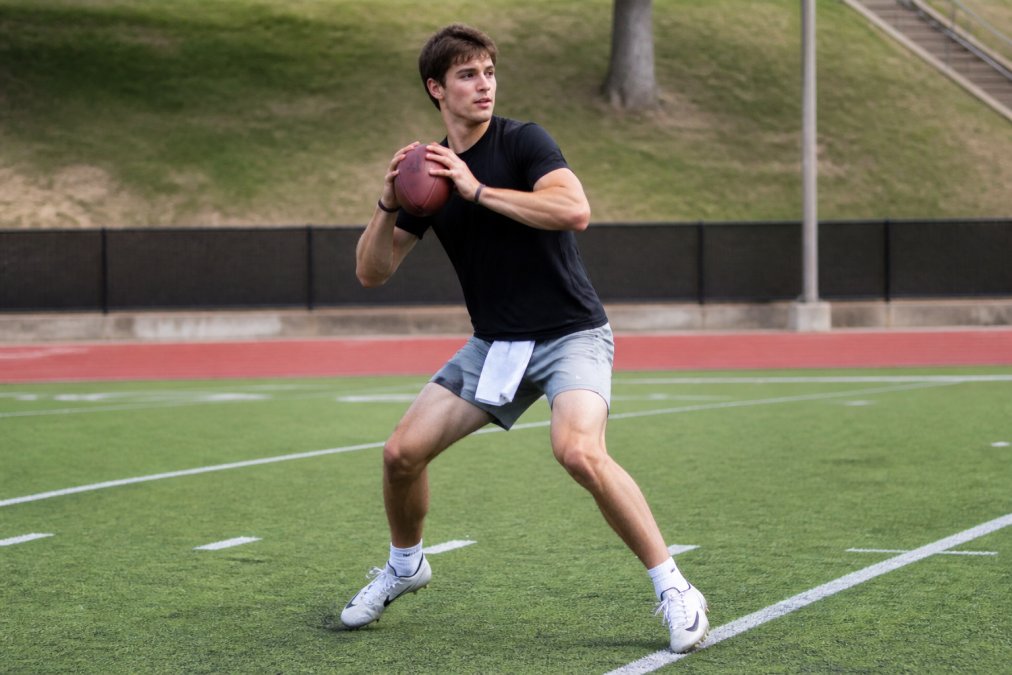
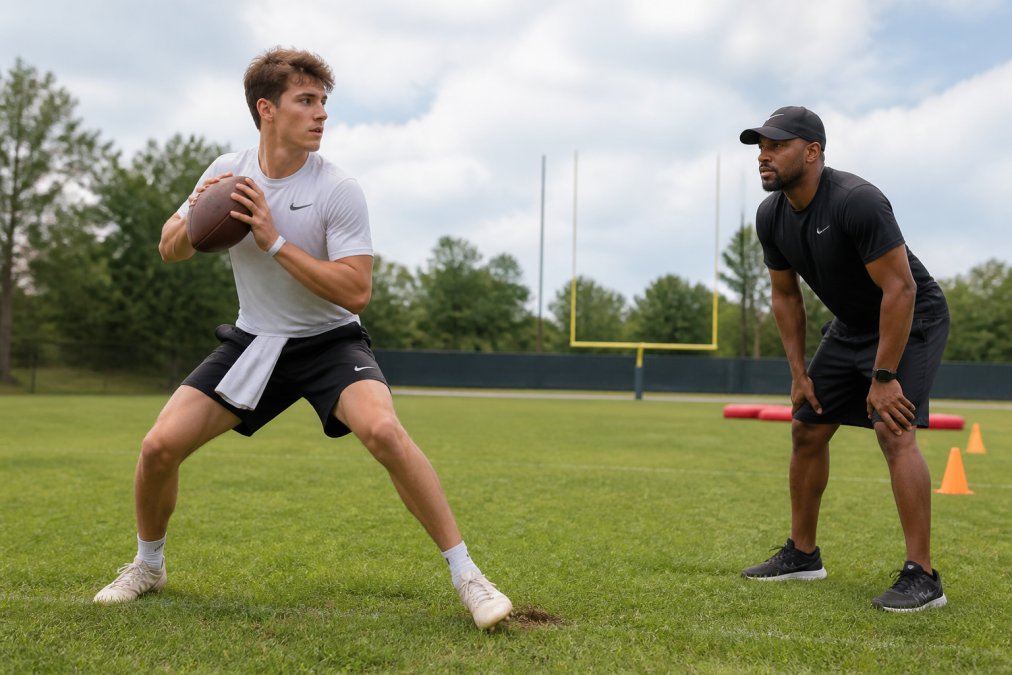
- The Jab Step (The Trigger): On the snap, your first movement is a short, violent jab step with your back foot. This is not a step backward; it loads your weight onto your back leg, like a pitcher’s leg kick. The step should be no more than 6 inches; a longer step creates momentum that carries you too deep.
- The Shuffle (The Retreat): From the jab, you shuffle, not run backward. Your feet stay shoulder-width apart, your chest remains square to the line of scrimmage, and your eyes stay downfield. The shuffle is a controlled, rhythmic movement, left-right-left for a right-handed quarterback, that covers exactly 3 yards. Do not cross your feet or hop.
- The Plant (The Platform): On your third step, your back foot plants firmly into the ground as an active brace. Your weight should be on the inside of your back foot, your knee bent, and your hips loaded. This plant allows you to transfer energy from your legs through your core and into the throw. If you are drifting backward when you plant, you will lose velocity.
The Most Common Error: The False Step
The single biggest issue we see with young quarterbacks is the false step: taking a small step forward with the front foot before the jab. This adds a fraction of a second to your drop. The fix is mental: think about pushing your front foot into the ground and driving your back foot backward.
Troubleshooting: When the Drop Goes Wrong
If you are overshooting your 3-yard landmark, your jab step is too long, shorten it. If you are coming up short, be more explosive with the jab. If you feel off balance at the plant, check your base.
The ‘Cone Tap’ Drill for Depth Consistency
Set up a cone at exactly 3 yards behind your starting stance. Run your drop and, on your plant step, tap the cone with your back foot. Do not look down; the tap is a tactile cue. Run this 10 times, then remove the cone and visualize the landmark.
The ‘Pause and Reset’ Drill for Balance
Many quarterbacks rush the plant and immediately throw, leading to an unbalanced delivery. To fix this, run your 3-step drop and pause for a full second at the plant, holding your weight on your back foot with your hips loaded and eyes downfield.
Do not practice the 3-step drop at full speed until you can hit your landmark and hold your balance at half speed. Rushing the drill before the mechanics are sound will only reinforce bad habits.
Step 2: Build Rhythm With the 5-Step Drop
The 5-step drop gives you time for deeper routes like corners, posts, and deep digs (usafootball.com). It requires more depth, around 5 to 7 yards, and a longer rhythm window of roughly 2.5 to 3 seconds. This is where you need to feel pressure developing while keeping your eyes downfield.
The mechanics mirror the 3-step, but with two extra shuffle steps. Drive off your back foot, take five controlled shuffle steps straight back, and on your fifth step, plant your back foot, sink your hips, and hitch into your throw. Your upper body stays calm; only your feet move with urgency.
To build consistency, have a coach or teammate call out “hut” at random intervals, and time your drop so you hit your landmark exactly as the ball would arrive on a deep route.
For quarterbacks agility training, add a defender cone at the edge of the pocket. As you hit your fifth step, shuffle laterally away from the cone before resetting your platform. This simulates climbing the pocket and keeps your base active under pressure.
Step 3: Eliminate False Steps and Improve Balance
A false step is any step that does not move you toward your drop depth. Eliminating false steps starts with your first movement after the snap: your back foot should move directly backward, not forward or sideways.
Run the “mirror drill” to fix this. Stand facing a mirror or have a coach film you from the side. Take your drop and watch your first step. If it moves forward even an inch, correct it by thinking about pushing off your front foot and driving your back foot straight back.
Balance is the other half of this equation. If you are off balance at your final step, you cannot transfer weight into the throw. Practice pausing at your landmark for a full second before throwing.
Step 4: Add Quarterback Agility Training for Pocket Movement
Quarterback agility training is about more than just drop backs. Pocket presence requires lateral movement, the ability to slide away from pressure while keeping your eyes downfield and your throwing platform intact.
Add the “pocket slide” drill to your routine. Set up two cones about 4 yards apart, simulating the tackle box. Start in the middle, take a 3-step drop, then shuffle laterally to one cone, reset your feet, and throw to a target. Repeat to the other side.
Quarterback Registration (Required) →
Another effective drill is the “backpedal to crossover.” From your stance, backpedal 5 yards, then use a crossover step to change direction and escape the pocket. The crossover is faster than a shuffle but sacrifices balance, so use it only when escaping, not when setting up to throw.
Step 5: Use Drills for QB Release Time Improvement
Drills for QB release time improvement focus on the connection between your feet and your arm. A quick release is about getting your feet set early so your upper body can fire without delay.
The “catch and throw” drill builds this connection. Have a partner stand 5 yards away and toss you a tennis ball. As you catch it, take a quick 3-step drop and throw it back. The lighter ball forces you to use your legs and hips for velocity.
For a more advanced progression, time your drops. Have a coach call cadence and start a stopwatch at the snap. The goal is to release the ball within 1.5 seconds on a 3-step drop and 2.5 seconds on a 5-step drop.
Your release time is a direct reflection of your footwork. If your drops are slow or your base is unstable, your release will suffer. Fix the feet first, and the arm will follow.
Common Mistakes and How to Fix Them
Every quarterback, from youth to the NFL, fights the same mechanical demons. The difference between those who fix them and those who don’t is the ability to diagnose the root cause and apply a targeted correction.
The False Step: The Timing Killer
What it looks like: The quarterback’s first movement after the snap is a step forward with the front foot before retreating.
The mechanical cause: The quarterback is thinking about the throw before the drop. The brain sends a signal to ‘get ready to throw,’ which triggers a forward weight shift.
The fix: The ‘Wall Push’ drill. Stand with your front foot against a wall. On the snap, push off the wall with your front foot, forcing your back foot to move backward immediately. Do 10 reps against the wall, then 10 reps without it.
Dropping Too Deep: The Rhythm Breaker
What it looks like: The quarterback overshoots the 5-yard or 7-yard landmark and is forced to throw off his back foot or reset his platform.
The mechanical cause: The first step is too long, creating too much backward momentum. The quarterback is also likely running backward instead of shuffling, which adds distance.
The fix: The ‘Landmark Stick’ drill. Place a pool noodle or a soft stick on the ground at your exact drop depth. Run your drop and, on your final step, you must land with your back foot on the far side of the stick. Shorten your first step and focus on controlled shuffles.
Weight on Heels: The Power Leak
What it looks like: The quarterback leans back during the drop, causing his weight to settle on his heels. The throw loses velocity and accuracy.
The mechanical cause: The quarterback is trying to see the field over the rush and compensates by leaning back. This also happens when the quarterback is not staying low in his stance.
The fix: The ‘Balance Beam’ drill. Place a 2×4 piece of wood on the ground. Run your drop along the beam. The narrow surface forces you to stay on the balls of your feet to maintain balance. This ingrains the feeling of a forward-leaning, athletic base.
Crossing Feet on Lateral Moves: The Balance Destroyer
What it looks like: When sliding in the pocket, the quarterback crosses his feet, causing him to lose balance and his throwing platform to collapse.
The mechanical cause: Panic. When pressure comes, the natural instinct is to run, which involves crossing the feet. The quarterback is not staying in his ‘passing posture.’
The fix: The ‘Mirror Slide’ drill. Have a coach stand 5 yards away and point left or right. The quarterback shuffles in that direction, keeping his feet shoulder-width apart and never crossing them. The coach randomly changes direction. Start at half speed and increase intensity as the movement becomes automatic.
Rushing the Drop: The Timing Disconnect
What it looks like: The quarterback arrives at his landmark before the route develops, forcing him to wait, which kills his rhythm and allows the pass rush to close.
The mechanical cause: The quarterback is not synced with the route timing. He is dropping as fast as possible instead of dropping in rhythm with the play.
The fix: The ‘Cadence Drop’ drill. Have a coach call out a cadence and a route (e.g., ‘Slant’ or ‘Post’). The quarterback must time his drop so that his plant step coincides with the break of the route. This connects footwork to the passing game.
The Diagnostic Film Session: Your Most Powerful Tool
You cannot feel these errors in the moment; your body adapts to the flawed movement. This is why video analysis is non-negotiable. Set up your smartphone on a tripod at the line of scrimmage, perpendicular to your drop. Record 10 drops at game speed, then review the footage in slow motion. Look for the following:
- First Step Direction: Does your back foot move straight back, or does it drift forward or sideways?
- Base Width: Are your feet shoulder-width apart at the plant, or are they too narrow or too wide?
- Hip Position: Are your hips square to the line of scrimmage, or are they open or closed?
- Weight Distribution: At the plant, is your weight on the balls of your feet or on your heels?
Compare your drop to a professional’s; the differences will be obvious. This self-analysis is the fastest path to improvement because it turns an abstract feeling into a concrete visual. The film does not lie, and it gives you a clear roadmap for your next practice session.
Do not just run drills, diagnose them. Every rep is a data point. Use the film to identify the specific flaw, apply the targeted fix, and then re-record to confirm the correction. This cycle of diagnosis, correction, and verification is what separates quarterbacks who improve from those who plateau.
Frequently Asked Questions
How do you transition from a 3-step to a 5-step drop?
The transition starts with your base and rhythm. In a 3-step drop, you take three quick, explosive steps to get the ball out fast on short routes. For a 5-step drop, you add two more steps to create depth for deeper routes, but the tempo changes. Your first step should be a lateral push, not a backward fall, to avoid false steps. Practice both from under center and in the shotgun, keeping your eyes downfield and your chest square to the line of scrimmage.
What common footwork mistakes should quarterbacks avoid during a drop back?
The most common errors are false stepping, crossing your feet, and standing too tall. A false step happens when you step backward with your front foot first, which throws off your timing. Crossing your feet makes you lose balance and slows your setup. Keep your base shoulder-width apart and use short, powerful shuffle steps. Focus on a smooth hip sink and weight transfer to stay balanced and ready to throw.
How can footwork drills improve a quarterback’s release time?
Footwork sets your throwing platform. If your feet are late or out of position, your arm has to compensate, which slows your release. Drills that sync your drop-back rhythm with your throwing motion train your body to get set faster. When your plant foot hits the ground as the ball reaches your release point, the entire motion speeds up. Consistent reps build muscle memory, so your release time improves automatically without thinking about it.
What are the best agility drills for quarterbacks to improve pocket presence?
Agility drills that force lateral movement and quick direction changes are best. The mirror drill, where you shuffle side to side following a coach’s movements, teaches you to slide in the pocket without crossing your feet. Adding ladder drills improves your foot speed and coordination. These drills translate to evading pressure while keeping your eyes downfield, allowing you to step up and deliver an accurate pass under duress.