


Last Updated: November 16, 2026
Quick Summary
The five best visualization techniques for football players are first-person skill rehearsal, multi-sensory scenario replay, observer-perspective correction, coping and mistake-recovery visualization, and position-specific pre-snap imagery. Each targets a different part of performance, so rotate through all five rather than relying on one.
- First-person skill rehearsal is best for mechanics and footwork, done daily for 5-10 minutes.
- Observer-perspective correction is for fixing technique flaws after film review, not initial skill learning.
- In coping visualization, keep a ratio of one mistake to three successful recoveries.
- A pre-game visualization routine should take five to ten minutes and happen at the same time before every game.
- Practice visualization daily for 10-15 minutes, with a different focus each day of the week.
Table of Contents
- Why Mental Imagery Works for Football Players
- The 5 Best Visualization Techniques for Football Players
- Football Mental Rehearsal Examples by Position
- How to Write Visualization Scripts for Athletes
- Building a Pre-Game Visualization Routine
- Sports Visualization Exercises to Practice This Week
- Troubleshooting Imagery That Feels Flat or Unrealistic
- Register for QB Factory Mental Training
- Frequently Asked Questions
Why Mental Imagery Works for Football Players
Mental imagery is the practice of rehearsing a skill or scenario in your mind without physically moving.
Mental rehearsal is a skill you can train, not a talent you’re born with. A quarterback who pictures the blitz before the snap processes it faster when it comes.
The science backs this up.
Imagery isn’t daydreaming. It’s structured, repetitive, and specific.
Learn the full mental preparation routine for game day to build on these fundamentals.
The 5 Best Visualization Techniques for Football Players
These five visualization techniques are ranked by how directly they transfer to game day. Each one targets a different part of performance, so the best athletes rotate through all of them. Below, you’ll find a quick-reference table followed by a detailed breakdown of each technique, including how to do it, when to use it, and a position-specific example.
| Technique | Best For | When to Use | Difficulty |
|---|---|---|---|
| First-Person Skill Rehearsal | Mechanics and footwork | Daily, 5-10 min | Beginner |
| Multi-Sensory Scenario Replay | Game-speed decisions | 2-3x per week | Intermediate |
| Observer-Perspective Correction | Fixing technique flaws | After film review | Intermediate |
| Coping and Mistake-Recovery | Handling pressure and errors | Before high-stakes games | Advanced |
| Position-Specific Pre-Snap Imagery | Reading defenses and alignments | Pre-snap, in practice | Advanced |
1. First-Person Skill Rehearsal
First-person skill rehearsal means you picture the play through your own eyes, feeling your body execute the movement.
How to do it:
- Choose one specific skill (e.g., a three-step drop, a slant release, a pass set).
- Close your eyes and take two slow breaths.
- Run the skill in your mind at real speed, five to ten reps. Focus on the feel of the movement, not just the visual.
- If your mind wanders, gently return to the first rep.
When to use it: Daily, for 5-10 minutes, ideally before or after physical practice.
Position example: A quarterback pictures the ball leaving his hand on a 10-yard out route, feeling the laces and the follow-through.
Watch out: Picturing yourself from the outside (like watching film) is a different technique.
2. Multi-Sensory Scenario Replay
Multi-sensory scenario replay adds sound, touch, and emotion to the picture.
How to do it:
- Pick a specific game scenario (e.g., third-and-long from your last game).
- Close your eyes and recreate the scene: hear the cadence, feel your grip on the ball, see the safety rotating.
- Add one emotion (excitement, focus, urgency).
- Replay the play in real time, making the throw or executing the block.
When to use it: 2-3 times per week, especially before a game or after a tough practice.
Position example: A linebacker hears the quarterback’s cadence, feels his weight shift, and sees the guard pull before filling the gap.
Watch out: If you can’t conjure a sense (e.g., smell), focus on the ones you can. Not everyone is equally sensory.
3. Observer-Perspective Correction
Observer-perspective correction flips the camera. You watch yourself from the outside, like a coach reviewing your technique on film.
How to do it:
- After film study, identify one specific flaw (e.g., elbow dropping on a throw).
- Close your eyes and picture yourself from the outside, performing the skill with the flaw.
- Then, rewind and picture the corrected version: elbow high, follow-through complete.
- Repeat the corrected version 5-10 times.
When to use it: After film review, or whenever a coach points out a technical error.
Position example: A quarterback watches himself from behind, sees his front shoulder fly open, then imagines the same rep with a closed shoulder and accurate throw.
Watch out: Don’t use this technique for skill acquisition, use first-person for that. Observer perspective is for correction, not initial learning.
4. Coping and Mistake-Recovery Visualization
Coping visualization rehearses the bad moments before they happen. Readers focused on mistake recovery can find steps to overcome performance anxiety in youth football.
How to do it:
- Identify a common mistake for your position (e.g., throwing an interception, missing a tackle).
- Close your eyes and picture the mistake happening. Allow yourself to feel the frustration.
- Then, see yourself reset: take a breath, lock in, and execute the next play successfully.
- Repeat the recovery sequence 3-5 times.
When to use it: Before high-stakes games, or after a practice where you made a mistake.
Position example: A quarterback throws a red-zone interception, then imagines completing the next three passes. A receiver drops a pass, then sees himself catch the next one.
Watch out: Don’t dwell on the mistake, the ratio should be one mistake to three successful recoveries.
5. Position-Specific Pre-Snap Imagery
Position-specific pre-snap imagery trains your read before the ball is snapped. You picture the defense, anticipate the rotation, and decide before the play starts.
How to do it:
- Before the snap (in practice or a game), take a mental snapshot of the defense.
- Imagine the most likely coverage or pressure, and your response.
- Rehearse the decision: where the ball goes, which gap you attack, etc.
- Do this for 3-5 different looks per practice.
When to use it: Pre-snap, in practice, and during film study.
Position example: A quarterback sees a cover-2 shell and pictures the throw to the tight end seam. A receiver sees press coverage and imagines the release. A lineman sees a wide-9 rusher and rehearses the kick slide.
Watch out: Don’t overthink, this should be a quick mental rep, not a long visualization.
For deeper quarterback-specific work, these quarterback mental preparation drills apply these techniques directly.
Football Mental Rehearsal Examples by Position
Football mental rehearsal looks different at every position. The core techniques stay the same, but the scenarios change.
Quarterback: Picture a cover-2 shell, the middle linebacker drifting, and your tight end sitting in the seam. Rehearse the throw before the snap.
Wide receiver: Imagine the corner pressing, your release off the line, and the ball arriving over your outside shoulder.
Lineman: Picture the edge rusher’s first step, your kick slide, and your hands landing inside. Rehearse the anchor.
The key is specificity. Generic imagery does little. Position-specific scenarios build real anticipation.
How to Write Visualization Scripts for Athletes
Visualization scripts for athletes turn vague daydreams into repeatable reps. A good script is short, specific, and written in the present tense.
Here’s the format we use:
- Set the scene: “It’s third down, fourth quarter, crowd is loud.”
- Add the senses: “I feel the turf, hear the cadence, grip the laces.”
- Script the action: “I read the safety, plant, and throw to the back shoulder.”
Write it once, then read it before practice. Keep it under two minutes. The goal is repetition, not length.
Building a Pre-Game Visualization Routine
A pre-game visualization routine should take five to ten minutes and happen at the same time before every game. Consistency helps your brain switch into focus mode on command. A weekly practice plan builds the skill over time.
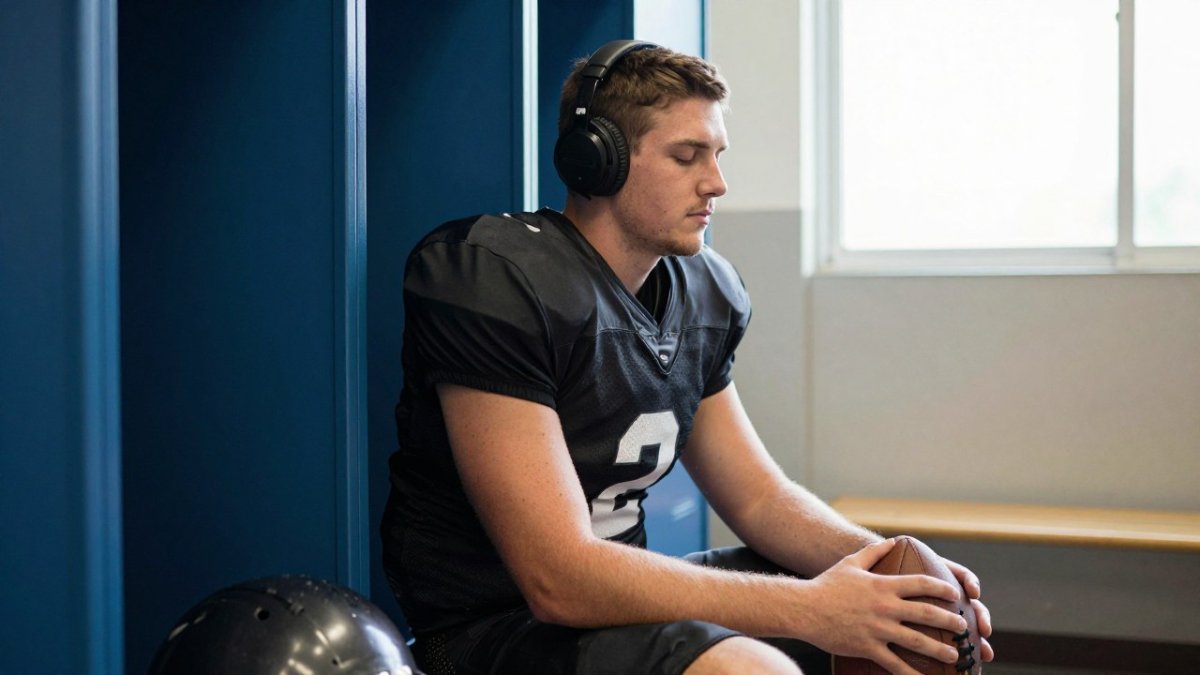
The Pre-Game Routine (5-10 Minutes)
Here’s a routine that works:
- Breathe: Four slow breaths to settle the nerves.
- Replay your first series: Picture your first three plays going well.
- Rehearse one adversity: See a mistake, then see your recovery.
- Lock in your job: One sentence on your role for the game.
Keep it simple. The routine is a trigger, not a ritual you obsess over.
Weekly Practice Plan for Visualization
To make visualization a habit, practice it daily for 10-15 minutes, with a different focus each day. Here’s a sample week:
- Monday: First-person skill rehearsal (5-10 min) – focus on one fundamental.
- Tuesday: Multi-sensory scenario replay (10 min) – recreate a game situation.
- Wednesday: Observer-perspective correction (10 min) – review film and correct one flaw.
This plan progresses from basic skill work to complex scenarios, building vividness and control.
Troubleshooting Common Issues
If your imagery feels flat or unrealistic, you’re not alone. Here are fixes for common problems:
- Can’t “see” anything: Focus on feel and sound instead. Not everyone is visual.
- Scenes feel slow or fake: Use real game film to prime the picture first.
- Mind wanders: Shorten the script to one play and one outcome.
Measuring Progress
Track your sessions with a simple log. After each visualization, rate vividness (1-5), control (1-5), and how well it transferred to practice or games.
Age and experience change the approach. Younger athletes do better with short, simple, fun imagery. Older players can handle longer, more detailed scripts and pressure scenarios.
For a complete game-day mental preparation routine, see our guide.
Sports Visualization Exercises to Practice This Week
These sports visualization exercises give you a starting point. Pick two and run them daily for a week.
- The ten-rep drill: Ten first-person reps of one skill, real speed.
- The sense check: Replay one play using all five senses.
- The film flip: Watch a clip, then picture the fix from the outside.
Track how vivid each rep feels. That feedback tells you whether it’s working.
Troubleshooting Imagery That Feels Flat or Unrealistic
If your imagery feels flat, you’re not broken. Most players struggle at first. The fix is usually more detail, not more effort.
Common problems and fixes:
- Can’t “see” anything: Focus on feel and sound instead. Not everyone is visual.
- Scenes feel slow or fake: Use real game film to prime the picture first.
- Mind wanders: Shorten the script to one play and one outcome.
Measuring progress matters too. Ask yourself after each session: was the picture clear, did it feel real, and could I repeat it?
Age and experience change the approach. Younger athletes do better with short, simple, fun imagery. Older players can handle longer, more detailed scripts and pressure scenarios.
Register for QB Factory Mental Training
Mental rehearsal only pays off with structure and coaching. That’s where we come in.
Our classroom-style mental preparation helps athletes handle high-pressure scenarios before they happen.
We train quarterbacks, receivers, and linemen with individualized drills that combine physical mechanics with mental preparation.
Register for the QB Factory program and give your athlete the mental edge that separates good players from recruited ones. Players in the Eastern Shore area can also complete QB registration to get started in person. Ready to take the first step? Apply today!
The gap between a player who reacts and one who anticipates is rarely physical. It’s mental reps done consistently.
Frequently Asked Questions
How often should football players practice visualization?
Short daily sessions beat occasional long ones. Five to ten minutes a day, plus a longer 10-15 minute session before games, gives players enough repetition to make imagery feel automatic. Build it into an existing habit, such as right after stretching or before bed, so it does not get skipped. The visualization techniques that stick are the ones tied to a fixed slot in the day, not the ones saved for spare moments.
What should a football player picture during mental rehearsal?
Picture one specific play, not a highlight reel. A quarterback might rehearse the snap, the drop, the linebacker sliding into the throwing lane, and the ball leaving his hand. A receiver might see the release off the line, the break at the top of the route, and the catch. Include the down, distance, crowd noise, and field conditions so the scene carries sensory detail instead of feeling like a video game.
Can visualization improve football performance if a player struggles to stay focused?
Yes, but start smaller. Players who lose focus during imagery should begin with 60-90 second clips of a single movement, such as a pass-rush get-off or a three-step drop, and build up as concentration improves. Pairing imagery with slow breathing helps settle a busy mind. If scenes still feel vague after a few weeks, add a real physical rep first, then replay it mentally while the feeling is fresh.
How long should a visualization session last?
Most players get value from 5-10 minutes of focused work. A pre-game visualization routine can run 10-15 minutes because it covers several situations: opening drive, third down, red zone, and a mistake-recovery scenario. Quality matters more than length. A tight five minutes with vivid sensory detail does more than a half hour of drifting, low-attention daydreaming.