
Table of Contents
- Why QB Mechanics for Better Accuracy Start With the Lower Body
- Quarterback Drop Back Footwork Drills That Build a Repeatable Platform
- Common Quarterback Mechanical Errors That Kill Accuracy
- Quarterback Release Point Drills for Tighter Ball Placement
- Warm-Up Routines and Arm Care for Throwing Mechanics
- Video Self-Analysis and Mental Visualization for Faster Fixes
- Conclusion
- Frequently Asked Questions
Last Updated: September 16, 2026
Why QB Mechanics for Better Accuracy Start With the Lower Body
Ask a quarterback why his deep ball sails, and he’ll blame his arm. Ask a coach who has watched thousands of reps, and you’ll hear a different answer: the throw starts in the ground. Quarterback mechanics for better accuracy are built from the feet up, and no arm talent compensates for a lower body that fires late, narrow, or off-balance.
Base of Support and Weight Transfer
Base of support is the width and stability of your stance at release, and it determines whether your weight can travel forward through the throw. A narrow base forces the front foot to open early, pulling the hips out of sequence.
Hip-Shoulder Separation and the Kinetic Chain
Hip-shoulder separation is the rotational gap between your pelvis and upper torso during the throw. The hips open first, the shoulders follow, the arm comes last, that delay stores and releases torque.
Film from behind the quarterback at hip height. From that angle, hip-shoulder separation is visible in a single frame, and you can count the gap in real time. Most athletes have never seen their own hips lead or lag.
Quarterback Drop Back Footwork Drills That Build a Repeatable Platform
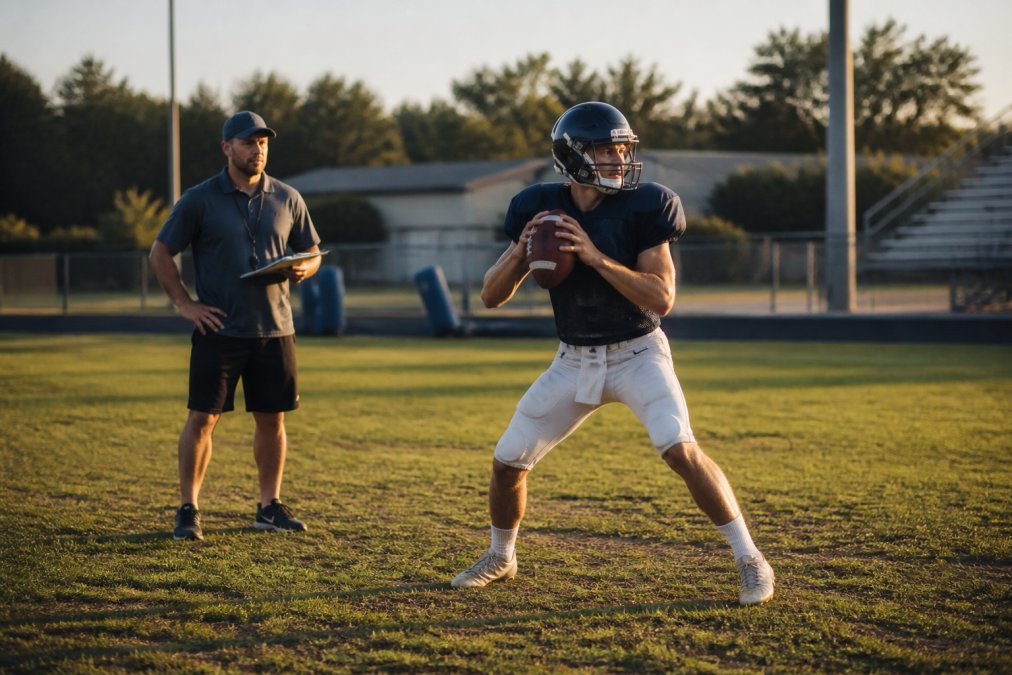
Quarterback drop back footwork drills build the platform every throw is launched from. A repeatable drop means the same steps, depth, and final stride every rep, so the upper body never adjusts mid-throw. What most drill lists skip is why the platform matters biomechanically, and how to load it so the pattern transfers to live reps.
Why the Platform Is a Load-Bearing Structure
Think of the plant leg as a spring, not a post. When the front foot lands, the lead leg absorbs force briefly, then extends, driving the pelvis into rotation. If the plant is shallow, heel-first, knee locked, weight on the outside of the foot, the spring never loads, and the arm manufactures the throw alone.
Four Drills, With Parameters That Matter
Four drills target the platform directly, each with a measurable checkpoint.
- Three-step and five-step ladder drops. Set five cones at measured depths, typically 3, 5, 7, 9, and 11 yards for high school and college spacing. Drop to each, plant, and throw to a net. Checkpoint: step length should vary by no more than a few inches rep to rep. A consistently shorter last step means the athlete is decelerating into the throw.
- Drop-and-slide. Drop back, then slide laterally two steps before throwing, training the base to reset under pressure. Checkpoint: the plant foot should re-establish a shoulder-width base before the arm starts forward.
- Hip-turn plant drill. On the plant step, exaggerate the hip turn toward the target. Ten reps per direction. Checkpoint: the back hip should finish facing the target, not the sideline.
- Blind drop. Drop with eyes closed, then open on the plant and locate the target. Checkpoint: the athlete should arrive at the same depth with eyes closed as with eyes open.
Loading the Pattern With Equipment
Three tools change how fast the footwork pattern sticks:
- Resistance bands around the hips. A partner holds light band tension from behind while the quarterback drops, forcing him to push through the ground rather than drift backward. Use light tension, heavy bands teach leaning, not loading.
- Mini-bands above the knees. Worn during ladder drops, they cue the athlete to keep the knees tracking over the toes instead of caving inward, protecting the plant knee.
- Weighted footballs (light, not heavy). A slightly heavier ball during short, controlled drops exaggerates the feel of the lower body driving the throw. Keep volume low and distance short, heavy-ball work at full distance commonly causes arm soreness.
Film the drop from the side at hip height. The plant foot, the hip turn, and the elbow position should all be visible in the same frame. If the elbow is already forward when the foot lands, the sequence is reversed and no amount of arm work will fix it.
Under Center vs. Shotgun: Different Drops, Same Principles
The shotgun formation removes the initial turn from center, so the drop starts with the catch and the first step is already backward. Under center adds a turn-and-open phase before the first drop step.
The Injury Layer Competitors Skip
The throwing motion places repeated rotational stress on the shoulder and elbow, and the lower body is the buffer that absorbs most of it. When the platform is late or narrow, that stress shifts upstream to the rotator cuff and the ulnar collateral ligament. Coaches who track soreness alongside film often find the accuracy dip and the first complaint of elbow tightness in the same week, both trace back to the same broken sequence.
Common Quarterback Mechanical Errors That Kill Accuracy
Common quarterback mechanical errors fall into a handful of patterns, and almost all trace back to timing rather than strength. Two account for the majority of missed throws.
Long Wind-Up and Late Release
A long wind-up means the ball travels farther behind the shoulder before the arm comes forward. That extra path adds time, letting defensive backs close, and pushes the release point back so the ball arrives late and low.
Throwing Off the Back Foot
Throwing off the back foot happens when the front foot never plants, usually because the quarterback is bailing from pressure. The ball floats, the spiral softens, and deep throws hang.
Throwing off the back foot repeatedly under pressure is a leading contributor to elbow and shoulder stress in young quarterbacks. The arm absorbs energy the lower body should have transferred. Fix the plant before the arm pays for it.
Quarterback Release Point Drills for Tighter Ball Placement
Quarterback release point drills train the hand to arrive at the same spot at the same time on every throw. Release consistency separates a catchable ball from a contested one.
Three drills that work:
- Wall throws. Stand two feet from a wall and throw with a compact motion. The wall forces a quick, repeatable release.
- Kneeling throws. Kneel on the back knee and throw to a partner. Removes the lower body and isolates the release.
- Target-frame drill. Hang a frame at catch height and throw through it. Ten reps from three arm slots: over the top, three-quarter, and sidearm.
Warm-Up Routines and Arm Care for Throwing Mechanics
A warm-up is not stretching. It is a progressive sequence that raises tissue temperature and rehearses the throwing motion at increasing intensity. Most quarterbacks treat it as a formality, then wonder why their first ten throws are their worst. The warm-up is where offseason mechanics get reinforced or overwritten by sloppy early reps.
The Biomechanical Case for a Real Warm-Up
The shoulder is a ball-and-socket joint held together mostly by soft tissue, and the throwing motion asks it to rotate faster than almost any other human movement. Cold tissue is less elastic, so the same throw that feels fine at full warm-up strains the rotator cuff and labrum more when the arm is cold.
A Practical Routine, With Purpose Behind Each Step
- General movement. Five minutes of jogging, skipping, and lateral shuffles. Purpose: raise core temperature and heart rate so blood flow to the throwing arm increases before the first throw.
- Band work. Rotator cuff and scapular loading exercises with a light band, two sets of 12 per movement. Purpose: wake the small stabilizers that hold the humeral head in the socket during the throw. Common movements: external rotation at the side, rows, band pull-aparts.
- Progressive throwing. Start at 10 yards, work to 30, then back down. Never start at full distance. Purpose: progressively load tissue while mechanics are still simple.
- Mechanical reps. Five throws at each of the three arm slots, focusing on the plant and release. Purpose: rehearse the exact game sequence at game speed before the pressure of a live rep.
Equipment That Earns Its Place
Three training aids consistently earn their bag space:
- Light resistance bands (rotator cuff and scapular work). The standard tool for pre-throw activation, cheap, portable, and well established in sports medicine.
- A towel or light weighted ball for arm-path drills. Short, controlled reps reinforce the release point without the stress of full-distance throwing. Keep volume low.
- A foam roller or lacrosse ball for soft-tissue work. Used on the lats, thoracic spine, and posterior shoulder before band work. A tight lat limits shoulder external rotation, which changes the release point. Rolling before throwing is a mechanical intervention, not a recovery one.
What to avoid: heavy weighted balls thrown at full distance, and any program that treats soreness as something to throw through. Both are common causes of arm injuries in young quarterbacks.
Core Engagement Ties the Routine Together
Core engagement ties the routine together. A quarterback who throws with a loose trunk loses the connection between hips and arm, and the release point drifts. Two sets of dead bugs and Pallof presses before throwing wakes the trunk up. The Pallof press trains anti-rotation, resisting the pelvis twisting away from the target, exactly what the throwing motion demands on the plant leg.
A warm-up that skips band work and jumps straight to full-distance throwing is the most common pattern behind early-season arm soreness. The rotator cuff needs activation before it needs load. Five minutes of band work before the first throw is the cheapest injury insurance a quarterback has.
Mental Visualization Belongs in the Warm-Up
Most warm-up routines are purely physical. The best ones aren’t. Before the first mechanical rep, the quarterback should picture the plant, hip turn, and release in sequence, the same sequence he’ll run in the game. Pairing the physical warm-up with mental rehearsal of the exact throw he expects on Friday night primes both tissue and decision-making.
Video Self-Analysis and Mental Visualization for Faster Fixes
Watch in this order:
- Feet first. Did the front foot plant before the arm came forward?
- Hips second. Did the hips open before the shoulders?
- Release third. Did the hand arrive over the top at the same point as the previous rep?
Accuracy improves fastest when film review, mental rehearsal, and physical reps run as one loop. Watching without rehearsing, or rehearsing without film, leaves half the correction on the table.
A note on biomechanics and injury: the throwing motion places repeated stress on the shoulder and elbow, and poor sequencing shifts load from larger muscles to smaller ones. Coaches who track completion percentage alongside film often find the accuracy dip and the sore arm in the same week.
Conclusion
The hardest part of rebuilding QB mechanics is patience. Lower body changes take weeks to feel natural, and old habits return the moment a live rush arrives.
NCAA recruiting rules and eligibility guidance
Frequently Asked Questions
How do footwork and base stability impact throwing accuracy?
Footwork sets the platform everything else builds on. If a quarterback’s base of support is too narrow or his feet are pointed the wrong direction, the hips cannot rotate through the throw, and the ball sails or dives. A consistent drop back keeps the feet under the frame so weight transfer happens on time. Drilling the drop until it is automatic frees the quarterback to read the defense instead of thinking about his feet.
What are the most common mechanical flaws that cause inaccuracy?
Three flaws show up most: a long wind-up that slows the release, throwing off the back foot instead of transferring weight forward, and opening the front shoulder too early. Each one throws off timing between the hips and the arm. Film your quarterback from the side and from behind. If the front shoulder beats the hip rotation, or the back foot stays planted through the release, that is the error to fix first.
How can quarterbacks improve release point for better ball placement?
Release point drills train the arm to come over the top at the same spot every rep. Start with one-knee throwing to isolate the upper body, then progress to close-range target work at five to ten yards. Focus on a consistent arm slot rather than a strong throw. A repeatable release point means the ball comes out at the same angle every time, which is what turns a good read into a completed pass.
Are there specific drills to fix a long wind-up in a throwing motion?
Yes. The fastest fix is shortening the path from hand break to release. Use a wall or partner at close range and throw with a two-count rhythm: break, throw. No hitch. Tennis ball throws and half-knee throws also force a quicker release because the arm cannot loop behind the head. Reps at game speed matter more than volume. Ten focused minutes beats an hour of lazy throws.
Quarterback accuracy is a sequencing problem, and sequencing is coachable. QB Factory combines mechanics work, film-based self-analysis, and classroom mental preparation so athletes stop guessing why a throw missed and start fixing it. Register for QB Factory training and build the platform that holds up when the pocket collapses.