


Table of Contents
- Master the Fundamentals of Quarterback Mechanics
- Quarterback Drop Back Footwork Drills
- High School Quarterback Throwing Drills
- Quarterback Accuracy Drills for Consistent Ball Placement
- Common Quarterback Mechanics Mistakes and How to Fix Them
- Build Your Mechanics Practice Plan
- Transfer Mechanics from Drills to Game Situations
- Frequently Asked Questions
Last Updated: October 17, 2026
Master the Fundamentals of Quarterback Mechanics
Quarterback mechanics form the foundation of every throw. Without proper footwork, arm position, and body alignment, even the most talented arms struggle to deliver accurate, consistent passes under pressure.
The best quarterback mechanics aren’t complicated. They’re repeatable. They’re built on three core pillars: posture, footwork, and release. Master these, and everything else, accuracy, arm strength, decision-making, becomes easier.
Posture and Ball Carriage
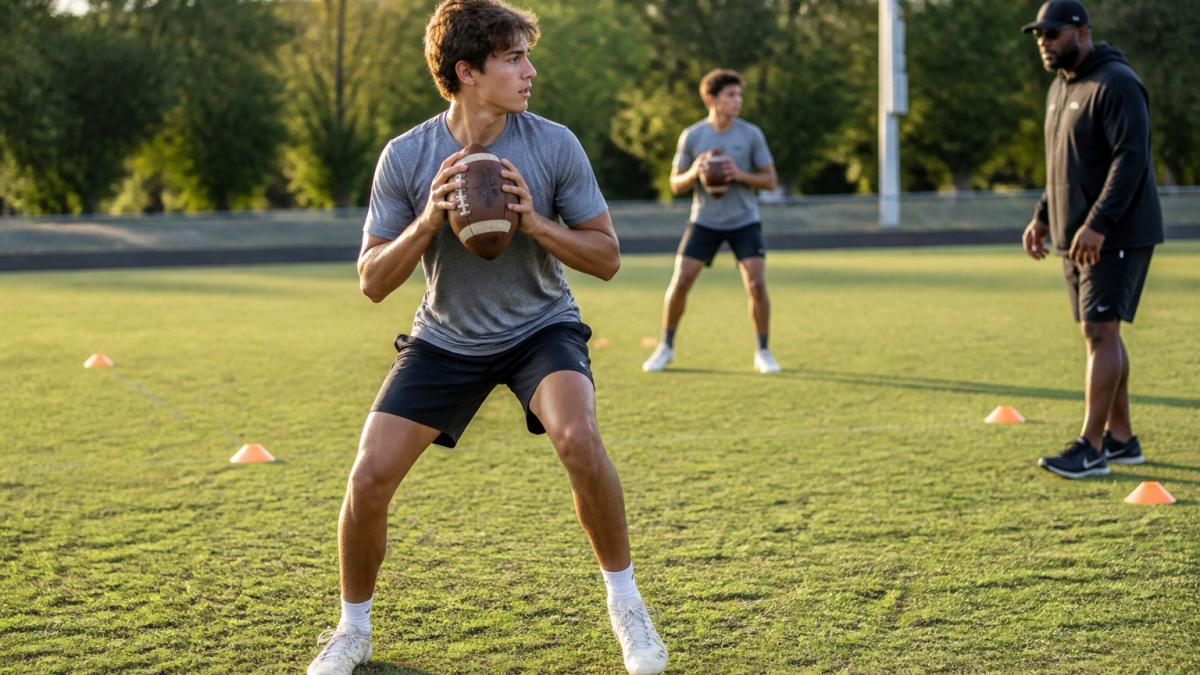
Your posture determines your power. A quarterback who slouches or leans loses arm speed and accuracy before the ball even leaves his hand.
Stand tall with your chest up and shoulders back. Your feet should be shoulder-width apart. Keep your head still and your eyes downfield.
Ball carriage matters just as much. Hold the ball at chest level, not down at your waist. Your fingers should be on the laces, not the seams.
Common mistakes we see:
- Holding the ball too low (forces a longer arm motion)
- Gripping too tight (kills your release and accuracy)
- Slouching or leaning forward
- Elbows flared out wide (slows your release)
Fix these and you’ll feel the difference immediately. Your throws will be tighter, faster, and more accurate.
Arm Position and Release Point
Your arm position determines your release point. A consistent release point is non-negotiable at the high school level.
Bring the ball up to ear level as you step into your throw. Your elbow should be at 90 degrees, roughly aligned with your shoulder.
The release itself happens when your fingers roll off the ball in sequence: pinky, ring finger, middle finger, index finger last. This creates backspin and accuracy.
Many quarterbacks rush their release or hold the ball too long. Both kill accuracy. Your release should feel quick and smooth, like flicking a light switch.
Film study is your best friend. Record yourself throwing from different angles. Watch your release point frame-by-frame. If it’s inconsistent, your accuracy will be too. Fix the release, fix the accuracy.
Quarterback Drop Back Footwork Drills
Footwork is the engine of quarterback mechanics. Your feet dictate your timing, your balance, and your ability to deliver on schedule.
The dropback is the foundation. Three-step, five-step, seven-step, each has a purpose. Learn them cold.
Three-Step Drop Progression
A three-step drop is quick. It’s used for short routes: slants, quick outs, bubble screens. You take three explosive steps backward, plant your back foot, and throw.
Here’s the progression:
-
Week 1-2: Footwork only, Practice the three-step drop without a ball. Focus on rhythm and timing. Your steps should be quick and controlled, not frantic.
-
Week 3-4: Add arm motion, Now add your arm. Step and throw in rhythm. Your third step and your release should happen at the same time.
-
Week 5+: Game speed, Do this drill at full speed. Add pressure. Have a defender rushing at you. Get comfortable under duress.
Do 20 reps per session, three times a week. Your feet will find the rhythm naturally after a few weeks.
Five-Step Drop Progression
A five-step drop is standard. It’s used for intermediate routes: dig routes, crossing routes, comebacks. You take five controlled steps backward, plant, and throw.
The progression mirrors the three-step:
-
Weeks 1-2: Footwork only, Five steps backward. Step-step-step-step-step. Plant. Throw. Focus on balance and control.
-
Weeks 3-4: Add arm motion, Sync your fifth step with your release. Your timing should be sharp.
-
Weeks 5+: Game speed and pressure, Full speed. Add defenders. Add noise. Practice game-like conditions.
Do 25 reps per session, three times a week. After consistent practice, this drop becomes automatic.
A common mistake is taking steps that are too long. Shorter, quicker steps give you better balance and timing. If you’re falling backward or off-balance, your steps are too big. Shorten them.
High School Quarterback Throwing Drills
Throwing drills build consistency. They teach your body the correct mechanics and let you practice them thousands of times before game day.
Footwork-to-Release Coordination
This drill synchronizes your footwork and your arm. It’s simple but effective.
Set up cones 10 yards downfield. Take a three-step drop. Throw to the cone. Focus on one thing: your release point. Is it the same every time? Is it high?
Do 30 reps. Then switch to a five-step drop and do 30 more.
Track your results:
- How many throws hit the target?
- How many were high or low?
- How many were off-target to the left or right?
This data tells you what to fix. If you’re consistently high, your release point is too high. Lower it. If you’re consistently left, your shoulders aren’t rotating enough. Rotate more.
Do this drill twice a week. It takes 15 minutes. The payoff is massive.
Throwing on the Move
Game situations don’t always let you stand in the pocket. Sometimes you need to move right, move left, or roll out and throw.
Set up two cones 15 yards apart. Jog between them. At each cone, plant your foot and throw to a target downfield.
Start at half speed. Build to full speed over three weeks.
Do 20 reps moving right, 20 reps moving left. The goal is to throw accurately while on the move, not just while standing still.
This is where high school quarterbacks separate themselves. Master this, and you’ll gain a competitive edge.
Quarterback Accuracy Drills for Consistent Ball Placement
Accuracy is the most important skill. You can have all the arm strength in the world, but if you can’t put the ball where it needs to be, you’re not helping your team.
Target-Zone Drills
Set up targets at different depths and widths. Throw to each one 10 times. Track your accuracy.
Quarterback Registration (Required) →
Here’s the layout:
- 5 yards deep, 2 yards left of center
- 5 yards deep, 2 yards right of center
- 10 yards deep, 3 yards left of center
- 10 yards deep, 3 yards right of center
- 15 yards deep, center
- 15 yards deep, 5 yards left of center
- 15 yards deep, 5 yards right of center
Throw 10 passes to each zone. Count how many hit the target. Aim for consistent hits. If you’re hitting fewer, that’s your weak zone. Practice it more.
Do this drill once a week. Your accuracy will improve.
Game-Speed Accuracy Work
Drills are great, but game speed is different. Add pressure. Add movement. Add real decisions.
Have a receiver run an actual route. You take a full dropback. You read the defense (or a simulated defense). You throw to your receiver in stride.
Do 20 reps. Vary the routes. Vary the coverage. Vary the pressure.
This is where mechanics meet decision-making. Your footwork has to be automatic so your brain can focus on reading the defense and putting the ball in the right spot.
Common Quarterback Mechanics Mistakes and How to Fix Them
Every quarterback has mechanical flaws. The ones who improve fastest are the ones who identify and fix them quickly.
Stride Direction and Base Issues
Your stride should be toward your target, not sideways or backward. A stride that drifts left or right kills your accuracy and arm strength.
Fix: Film yourself. Watch your feet. Are you striding toward your target? Or are you drifting? If you’re drifting, focus on stepping directly downfield. Use cones or yard lines to guide your footwork.
Do this drill 20 times per session. Your stride will straighten out with consistent practice.
Shoulder and Hip Rotation
Your shoulders and hips drive your throw. If they’re not rotating together, your arm has to do all the work. That’s inefficient and inaccurate.
Fix: Practice hip and shoulder rotation separately. Stand in place. Rotate your hips, then your shoulders, then throw. Feel the sequence. Now do it while stepping. The rotation should feel smooth and connected.
Do 30 reps. Focus on the feeling, not the result. Once your body learns the pattern, accuracy follows.
Release Point Inconsistency
If your release point changes, your accuracy changes. High releases go high. Low releases go low. Inconsistent releases go everywhere.
Fix: Film yourself from multiple angles. Mark your release point. Is it always at ear level? Always in front of your body? If it’s moving around, you need more reps at slower speeds. Slow down. Focus on consistency. Speed comes later.
Do slow-motion reps per week. Your release will stabilize.
The fastest way to improve is to identify your specific mechanical flaw, then drill it relentlessly. Generic practice doesn’t work. Targeted practice does.
Build Your Mechanics Practice Plan
Improvement requires a plan. Random practice doesn’t work. Structured practice does.
Weekly Structure and Repetitions
Here’s what a solid week looks like:
| Day | Focus | Duration | Reps |
|---|---|---|---|
| Monday | Footwork drills (3-step, 5-step) | 20 minutes | 50 total |
| Tuesday | Accuracy drills (target zones) | 25 minutes | 70 total |
| Wednesday | Film study and mechanics assessment | 15 minutes | N/A |
| Thursday | Throwing on the move | 20 minutes | 40 total |
| Friday | Game-speed accuracy work | 25 minutes | 60 total |
| Saturday | Competition or scrimmage | Varies | Game reps |
| Sunday | Rest | N/A | N/A |
Total weekly reps: 220+
This is the minimum. If you’re serious about improvement, you’ll do more. But consistency matters more than volume. Do this every week, and you’ll see improvement.
Self-Assessment Using Video
Video is your coach when your coach isn’t around. Record yourself every session. Watch it immediately.
Ask these questions:
- Is my posture tall and athletic?
- Is my ball carriage at chest level?
- Is my arm motion quick and smooth?
- Is my release point consistent?
- Am I striding toward my target?
- Are my hips and shoulders rotating together?
Score yourself 1-5 on each. Track your scores week to week. You should see improvement every week. If you’re not, something’s wrong. Adjust your practice.
This self-assessment takes 10 minutes. It’s the most valuable 10 minutes you’ll spend.
Transfer Mechanics from Drills to Game Situations
Drills build mechanics. Game situations test them. The gap between the two is where most quarterbacks struggle.
Here’s how to close that gap:
Start with simple situations. Throw to a stationary receiver 10 yards away. No defense. Just you and the receiver. Focus on perfect mechanics.
Then add complexity:
- Add a defender (but no pass rush)
- Add a pass rush (but no secondary coverage)
- Add full coverage and full pressure
Build gradually. Your nervous system needs time to adapt. Rush it, and you’ll revert to bad habits under pressure.
Spend 80% of your practice on drills. Spend 20% on game situations. After consistent work, that ratio can shift as you become ready for real games.
The quarterbacks who excel at the high school level are often the ones who practice with purpose, assess their mechanics honestly, and adjust relentlessly.
Improving quarterback mechanics takes commitment. It requires honest self-assessment and relentless drilling.
At QB Factory, we’ve built a proven system that combines these mechanical drills with game-situation training and mental preparation. If you’re serious about competing at the next level, Apply today! Your mechanics determine your future.
Frequently Asked Questions
How can a high school quarterback improve throwing accuracy?
Accuracy improves through consistent repetition of footwork-to-release drills and video self-assessment. Focus on three elements: matching your footwork to your throwing motion, maintaining a consistent release point, and practicing target-zone drills at game speed. Film yourself weekly to identify stride direction issues or arm slot inconsistencies. Most quarterbacks see measurable accuracy gains with structured practice.
What footwork drills help quarterbacks improve their drop back?
The most effective drills are three-step and five-step drop progressions performed without a ball first, then with a ball, then under pressure. Focus on maintaining your base, stepping toward your target, and resetting your feet before release. Practice these drills 3-4 times per week with 20-30 repetitions each. Add pocket movement drills to develop rhythm and timing under game-like conditions.
What are the most common quarterback mechanics mistakes?
The three biggest mistakes are inconsistent stride direction (stepping sideways instead of toward the target), poor shoulder and hip rotation (throwing only with your arm instead of your torso), and a moving release point (changing where the ball leaves your hand). Each fault directly reduces accuracy and consistency. Video analysis reveals these issues quickly; targeted drills can correct them with focused work.
How often should a high school quarterback practice mechanics?
Elite quarterbacks practice mechanics 4-5 days per week during the off-season, focusing on footwork, accuracy drills, and strength-and-conditioning work. During the season, maintain 2-3 dedicated mechanics sessions weekly to prevent regression. Each session should include warm-up work, footwork drills, throwing drills, and video review. Consistency matters more than session length; 45-60 minutes of focused work beats sporadic longer sessions.